Understanding Arlo Account Access
As smart home technology continues to evolve, Arlo’s security solutions stand out for their user-friendly design and comprehensive protection features. However, when it comes to managing who has access to your Arlo cameras and other connected devices, understanding the intricacies of account access is essential. Whether you’re trying to share access with family members or friends, knowing the different account types, permissions, and managing user access efficiently can enhance not just security, but convenience too. In this article, we’ll explore how to add another person to arlo account alongside valuable contextual insights on user management.
Account Types and Permissions
Before proceeding with user additions, it’s crucial to recognize that Arlo accounts operate under specific user roles which dictate levels of access. The primary user, typically the account holder, possesses full administrative rights. This includes the ability to add or remove users, adjust camera settings, and manage various notifications. On the other hand, added users, often referred to as “friends,” can access certain features but with limitations specified by the primary user. For instance, a friend will not be able to alter account settings or delete the primary user’s access. Understanding these distinctions helps in setting the appropriate permissions when adding users to your Arlo account.
Benefits of Adding Users
Integrating additional users into your Arlo account carries numerous benefits:
- Shared Responsibilities: Distributing access across family members enables important features like live monitoring and responding to alerts, ensuring better security coverage.
- Real-Time Notifications: When multiple users can receive alerts and notifications, the chances of overlooking critical updates diminishes significantly.
- User-Specific Permissions: Tailor access for diverse users, allowing them to perform actions such as viewing camera feeds while preventing undesired changes to the overall account settings.
Common Issues with User Access
Despite the convenience of shared access, users often encounter challenges. One common issue is confusion in the invitation process, where would-be new users struggle to link their email invitation with the Arlo app. Network issues may also hinder access or update errors, preventing new users from seamlessly joining the account. Furthermore, administrative users sometimes forget to set permissions accurately, leading to frustration for additional users who may feel limited. Understanding these common pitfalls is critical in preemptively addressing access issues.
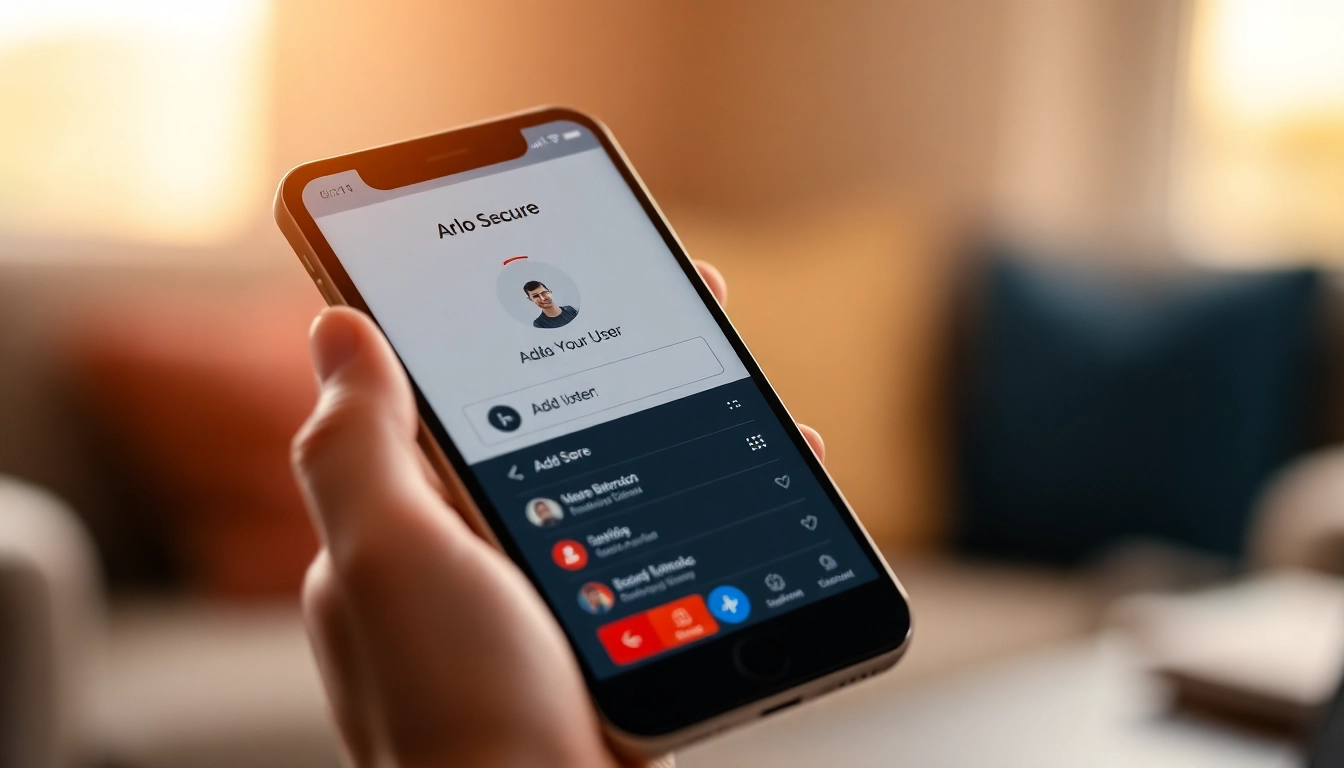
How to Add Another Person to Arlo Account
Step-by-Step Instructions
Here’s a detailed walkthrough on how you can effectively add another person to your Arlo account:
- Launch the Arlo Secure App on your device or navigate to my.arlo.com to log in to your account.
- Once logged in, locate the Settings option which should be easily visible in the main interface.
- Navigate to the Account section, where you will find an option titled Grant Access.
- Click or tap on Add to begin inputting details for the new user.
- Enter the necessary information, including the first name, last name, and email address of the person you wish to invite.
- After entering the details, double-check the information for accuracy, then click or tap on Send Invitation.
- The invited user will receive an email containing instructions to accept your invitation and create their own account if they do not already have one.
Tips for Entering User Details
When adding user details, accuracy is vital to ensure a smooth onboarding process. Here are some practical tips:
- Double-Check Spelling: Typos in names or email addresses can lead to failed invitations.
- Use Common Emails: Encourage friends or family members to use commonly monitored email accounts to avoid missed invitations.
- Communicate: Let the new user know they’ll be getting an invite, so they can check their email promptly.
Verifying User Access
Once a new user accepts the invitation, confirming their access is a necessary next step. Here’s how to do that:
- Log back into your Arlo account.
- Return to the Settings menu, then navigate back to Grant Access.
- Under the Invited Users section, you should see the newly added user.
- Check the status to ensure they have successfully accepted the invitation and can now access the system.
Troubleshooting Common Problems
What to Do if Access Fails
If a newly added user reports issues accessing their account after acceptance, consider the following troubleshooting practices:
- Check Email Confirmation: Ensure the user has accepted the email invitation; sometimes, confirmation emails can land in spam folders.
- Password Issues: If they are unable to log in with their credentials, a password reset might be necessary.
- Technical Support: If problems persist, guiding them through contacting Arlo’s customer support can remedy technical hitches.
How to Revise User Permissions
Modifying existing user permissions can be straightforward. Here’s how to proceed:
- Access your Arlo account and navigate to Settings.
- Under Grant Access, select the user whose permissions you desire to change.
- Make adjustments, like modifying their viewing capabilities or removing access altogether if necessary.
- Save changes to ensure that the updated permissions take effect immediately.
Resources for Further Help
Should you encounter persistent issues, Arlo provides extensive resources, including:
- Online FAQs and knowledge base articles available on their official website.
- Community forums that allow users to share experiences and find solutions from fellow Arlo users.
- Dedicated customer support that can assist with specific issues beyond basic troubleshooting.
Optimizing Your Arlo Experience
Best Practices for Security
By effectively managing user access, you can greatly enhance the security of your smart home ecosystem:
- Limit Permissions Where Necessary: Only grant the bare minimum of permissions required for each user to perform their tasks.
- Regularly Review User Access: Make it a habit to periodically check and update user permissions to ensure everyone has appropriate access.
- Set Up Alerts for Unusual Activities: Take advantage of Arlo’s alert features to monitor unusual login activities or potential security breaches.
Regular User Management
Adapting and managing user roles and permissions should be an ongoing process, especially in families or shared settings. Regularly review and adjust user access as needed, keeping abreast of any changes in relationships or needs for system access. This might include removing users who no longer require access, thus ensuring your account remains secure and clutter-free.
Utilizing the Arlo Features with Multiple Users
When leveraging the shared access feature of Arlo, take full advantage of the offering. Multiple users can collaboratively use the live view capabilities, share and store recordings, and navigate through the various app features. Establish communication among users about how they can utilize their access efficiently—this can involve designating who monitors certain time frames or setting up shared alerts.
Frequently Asked Questions
Can Multiple Users Access the Same Account?
Yes, Arlo allows multiple users to access the same account, albeit with limitations. The primary user holds full administrative privileges while additional users function according to the permissions defined by the primary user.
How Do Notifications Work for Shared Accounts?
Notifications are sent to all users who have been granted access. Each user can receive live alerts about motion detection, device status changes, and more, depending on their individual notification settings.
Additional User Access on Different Devices
The Arlo Secure App supports multiple devices, meaning different users can access the same Arlo account from an assortment of smartphones, tablets, or computers without conflicts arising from simultaneous logins.