Understanding Holographic Stickers
What Are Holographic Stickers?
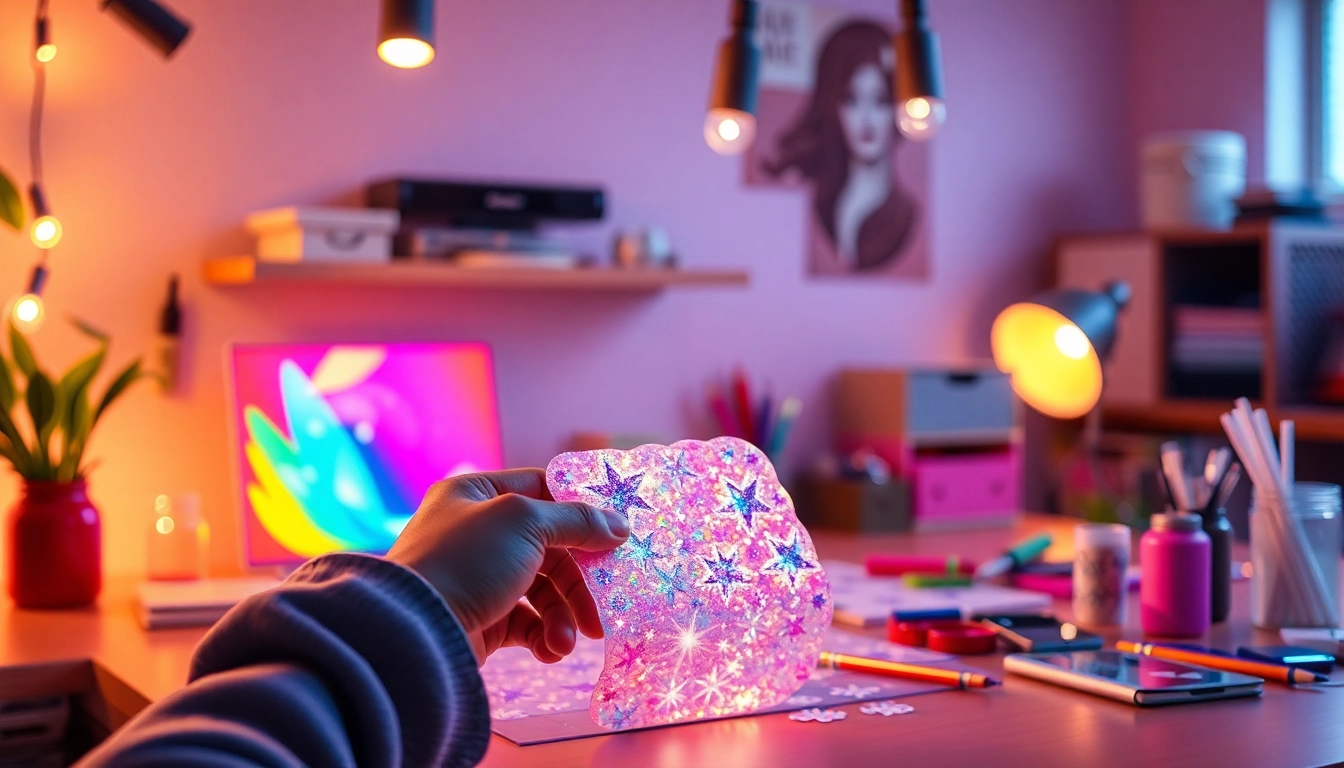
Holographic stickers are a unique type of decal that exhibit a shimmering, rainbow-like quality due to their specialized materials and manufacturing processes. Unlike standard vinyl stickers, the surface of holographic stickers is designed to reflect light differently, creating vibrant color shifts and reflections that change based on the angle of light and viewing perspective. This eye-catching effect makes them popular for a variety of applications, from personal items to branding materials.
Materials Needed for Holo Stickers
To create your own holographic stickers at home, you will need some specific materials which may vary slightly depending on your method. Here’s a comprehensive list:
- Holographic Sticker Paper: This can be found in craft stores or online and is essential for achieving the holographic effect.
- Printer: An inkjet printer is commonly used; make sure it’s compatible with the sticker paper.
- Cricut or Cutting Machine: While not necessary, these tools can help you create precise cuts.
- Laminating Sheets (optional): These can add durability to your stickers and enhance the holographic effect.
- Scissors or Craft Knife: For cleanly cutting out your designs if you’re not using a machine.
- Design Software: Software like Adobe Illustrator, or even free platforms like Canva, can be used to create your artwork.
Types of Holographic Vinyl
There are several types of holographic vinyl available on the market, each offering different aesthetic effects. The most common types include:
- Rainbow Holographic Vinyl: Displays a spectrum of colors that mimic the rainbow effect, great for colorful and vibrant designs.
- Silver Holographic Vinyl: Has a classic silver sheen with holographic effects, often used for a more polished look.
- Iridiscent Holographic Vinyl: Lighter in color, this type gives a subtle and iridescent effect that changes with light.
- Opaque Holographic Vinyl: Features a more solid base and is ideal for designs that require a strong visual contrast.
How to Make Holo Stickers: Step-by-Step Guide
Step 1: Design Your Stickers
The first step in creating holo stickers is to design your artwork. Use design software to create eye-catching visuals. Consider the following tips:
- Select Vibrant Colors: Holographic stickers thrive on bold, bright colors.
- Incorporate Interesting Shapes: Unique and intricate shapes can highlight the holographic effect.
- Keep It Simple: Sometimes less is more; detailed designs might lose their effectiveness in small formats.
Once you’re satisfied with your design, save it in a format compatible with your printer.
Step 2: Preparing Your Materials
Next, gather all your materials. Make sure your printer settings are adjusted for high-quality prints. For optimal results:
- Use the Right Paper: Ensure your holographic sticker paper is suitable for your type of printer (inkjet or laser).
- Test Print: Do a test print on regular paper to check layout, colors, and size before using the holographic paper.
Step 3: Print and Laminate
Once your designs are set and your materials are ready, it’s time to print. Follow these steps:
- Print your design on the holographic sticker paper using your printer.
- Allow the print to dry completely if using inkjet ink.
- For added protection, laminate the stickers using laminating sheets. This will help preserve the holographic effect and protect against wear and tear.
Finally, cut out your designs carefully using scissors or a cutting machine.
Using a Cricut to Create Holographic Stickers
Setting Up Your Cricut Machine
If you have a Cricut machine, you can elevate your sticker-making process significantly. Follow these preliminary steps:
- Install the Software: Ensure that the Cricut Design Space software is installed on your computer or device.
- Upload Your Design: Import your saved design into the software for cutting.
- Adjust Settings: Select the correct material settings for holographic vinyl; this ensures the machine cuts through correctly without damaging the underlying support.
Cutting Techniques for Holographic Materials
Cutting holographic materials requires attention to detail. Here are some techniques to enhance your results:
- Use a Fine Point Blade: A fine point blade provides the precision required for intricate designs.
- Test Cuts: Before committing to your entire design, perform a test cut to ensure settings are correct.
- Adjust Pressure Settings: Increase the pressure if the vinyl isn’t cutting cleanly but be cautious of cutting too deep.
Tips for Precise Cuts and Finishing
Even with precise machines, challenges can arise during cutting. Here are some tips to ensure a clean finish:
- Weed Carefully: After cutting, carefully remove excess vinyl without pulling away any parts of your design.
- Use Transfer Tape: To aid in transferring your sticker to a surface, using a clear transfer tape will help reposition and apply without distortion.
- Store Properly: Once cut, store your holographic stickers away from light and heat to maintain their shine.
Common Challenges When Making Holo Stickers
Adhesion Issues With Holographic Vinyl
One common issue when using holographic vinyl is adhesion. Holographic materials can sometimes struggle to adhere properly to surfaces, leading to peeling. Here are solutions:
- Clean Surfaces Thoroughly: Ensure that the surface where the sticker will be applied is clean and free of dust or oils.
- Temperature Considerations: Apply stickers at room temperature, as extreme cold or heat can affect adhesion.
- Use Strong Adhesives: In cases where vinyl alone is not sufficient, consider applying additional adhesive.
Common Mistakes and How to Avoid Them
When creating holographic stickers, there are a few mistakes that can detract from the final product:
- Improper Printing Settings: Ensure that you select the highest quality settings to capture the holographic effect accurately.
- Cutting Too Deep: Adjust the blade settings to avoid piercing the backing of the vinyl, which can ruin the cut.
- Not Allowing Prints to Dry: Patience is key; letting your prints dry improves the quality and longevity of the sticker.
Best Practices for Long-Lasting Stickers
To ensure your holographic stickers last as long as possible, consider these best practices:
- Use Protective Lamination: As mentioned earlier, lamination can increase durability against scratches and moisture.
- Avoid Direct Sunlight: Prolonged exposure to direct sunlight can diminish colors over time.
- Store Properly: Keep stickers in a cool, dry place when not in use to maintain their appearance.
Advanced Techniques for Professional-Quality Holographic Stickers
Layering Multiple Holographic Effects
For a truly standout design, consider layering various holographic effects. This can create multidimensional designs that catch the eye. Techniques include:
- Overlapping Designs: Layer different colors and textures of holographic vinyl to create depth.
- Varying Cut Depths: Using different cuts provides raised effects, enhancing the visual appeal.
Custom Designs and Artwork Tips
Creating custom artwork for your stickers can be incredibly rewarding. Here are some tips to elevate your designs:
- Experiment with Textures: Incorporate various designs and patterns to add interest.
- Utilize Seasonal Themes: Tailor designs to holidays, seasons, or trends to capture audience interest.
- Collect Feedback: Share designs with friends or online communities to gather constructive criticism before finalizing.
Using Software for Design Enhancement
Leveraging design software capabilities can take your holographic stickers to the next level. Some suggestions include:
- Layering in Design Programs: Make use of layer features in programs like Adobe Illustrator for complex designs.
- Using Effects: Explore effects that mimic depth or shadow to create lifelike stickers.
- High-Resolution Images: Always opt for high-resolution graphics to ensure optimal printing quality.
By following this detailed guide on how to make holo stickers, you can enjoy both the process of creation and the satisfaction of producing beautiful, shimmering designs that stand out. Whether for personal use, gifts, or even for sale, these tips and techniques empower you to create high-quality holographic stickers that truly shine.